© Copyright OMID MARDAN 2023

© Copyright OMID MARDAN 2022

3D Rendering

How 3D Visualizer Can Help Clients for their Brands?

Summary: 3D visualization is an essential tool for businesses looking to promote their brand and showcase their products or services. In this blog post, we will explore how 3D visualizers can help clients for their brands, including creating stunning visualizations, reducing costs, and improving customer engagement.
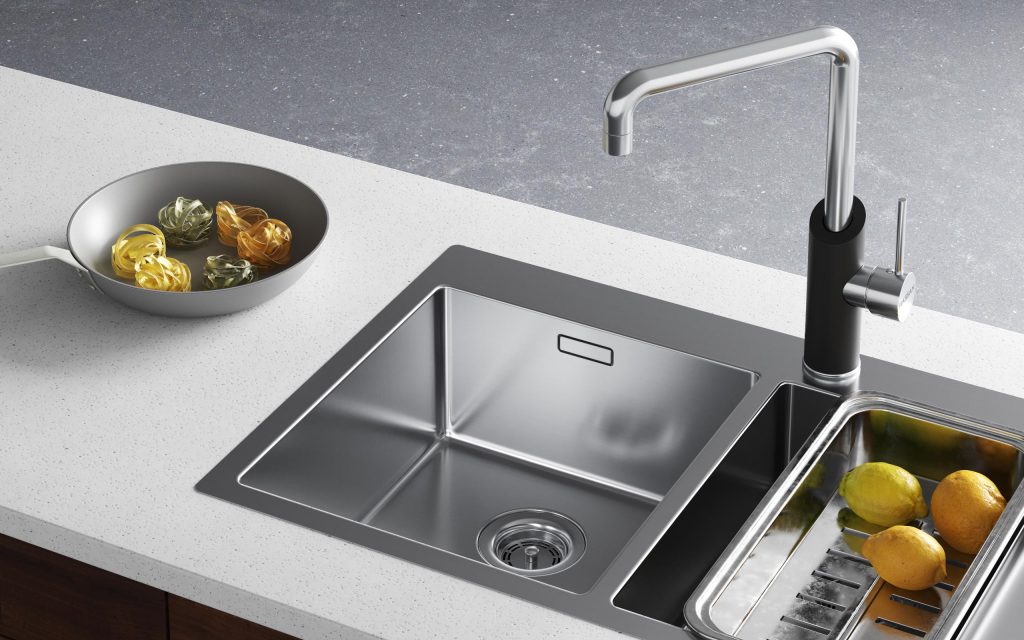
Introduction: In today’s competitive marketplace, businesses need to stay ahead of the curve when it comes to promoting their brand and products. 3D visualization is an excellent tool for achieving this goal, as it allows businesses to showcase their products or services in a realistic and engaging way.

How 3D Visualizers Can Help Clients:
1. Creating Stunning Visualizations: 3D visualizers are skilled in creating stunning and realistic visualizations of products or services. These visualizations can be used for marketing materials, websites, or social media, giving clients an edge over their competitors.

2. Reducing Costs: 3D visualization can also help clients save money in the long run by reducing the need for expensive physical prototypes or mockups. With 3D visualization, businesses can quickly and easily create virtual models of their products or services, saving time and money on production costs.

3. Improving Customer Engagement: 3D visualization can also help businesses improve customer engagement by providing an interactive and immersive experience. Customers can explore and interact with products in a virtual environment, allowing them to make informed decisions and build trust in the brand.

Best Practices:
When working with a 3D visualizer, it’s essential to communicate clearly and effectively about your brand and products. Provide as much information and reference material as possible to help the visualizer create a realistic and accurate representation of your product or service.

It’s also important to work with a visualizer who has experience in your industry or niche. This will ensure that they understand the unique characteristics and features of your product or service and can create a visualization that accurately represents your brand.

Conclusion: 3D visualization is a powerful tool for businesses looking to promote their brand and products. By working with a skilled 3D visualizer, businesses can create stunning visualizations, reduce costs, and improve customer engagement. With the right approach and best practices, businesses can achieve their marketing goals and stand out in the competitive marketplace.

References:
"The Power of 3D Visualization for Marketing" by Kevin Steffey
"How 3D Visualization Can Improve Product Design" by Chris Wilkes
"5 Ways 3D Visualization Can Help Your Business" by Andrew Knight
"The Importance of Working with a 3D Visualizer" by Jamie Gersbacher
"Using 3D Visualization for Branding and Marketing" by Stephanie Santoso

Last Posts


1920 1920 Omid Mardan

What Skills and Knowledge Do You Need to Be a Look Dev Artist?

Summary: Look development (Look Dev) is an essential aspect of 3D visualization, where artists work to create the visual style of a film, animation, or video game. In this blog post, we will explore the necessary skills and knowledge required to become a successful Look Dev artist, including understanding lighting, materials, textures, and rendering.

Introduction: Look development is the process of creating the visual style for a project, which involves everything from lighting and texturing to materials and rendering. Look Dev artists work closely with other members of the production team to ensure the project’s visual style matches the director’s vision. So, what skills and knowledge do you need to become a successful Look Dev artist?

Skills and Knowledge:
1. Understanding of Lighting: Lighting is one of the most crucial aspects of Look Dev, and a Look Dev artist needs to have a good understanding of lighting techniques and principles. They should be familiar with different types of lighting, such as natural light, artificial light, and global illumination, and understand how to use them to create the desired look.

2. Knowledge of Materials and Textures: A Look Dev artist must have a good understanding of different materials and textures to create realistic and compelling visuals. They should know how to create different surfaces such as metal, plastic, wood, or fabric, and apply the right texture maps such as roughness, bump, or displacement to achieve the desired effect.

3. Experience with Rendering: Rendering is the process of generating a final image or sequence from a 3D model, and a Look Dev artist should have experience with different rendering engines such as Arnold, Vray, or Redshift. They should be able to create render settings, optimize render times, and troubleshoot issues that may arise during the rendering process.

4. Knowledge of Software: Look Dev artists should be familiar with industry-standard software such as Autodesk Maya, SideFX Houdini, Substance Painter, or Adobe Photoshop. They should be able to navigate the software’s interface, use the software’s tools and functions effectively, and create custom scripts or plugins to automate repetitive tasks.

5. Collaboration and Communication: Look Dev artists need to work closely with other members of the production team, including directors, animators, and compositors. They should be able to collaborate effectively, provide feedback, and communicate their ideas clearly to ensure the project’s visual style meets the director’s vision.

Conclusion: Becoming a successful Look Dev artist requires a combination of technical and creative skills, including a deep understanding of lighting, materials, textures, and rendering. It also requires knowledge of industry-standard software, the ability to collaborate and communicate effectively, and a strong creative vision. With the right combination of skills and knowledge, Look Dev artists can create stunning visuals and contribute to the success of a project.

References:
"What is Look Development?" by Michael McCarthy
"Look Development: The Art of Creating a Believable World" by Nick Hopkins
"Lighting and Look Development Fundamentals" by Ryan Gitter
"Creating Compelling Textures for Look Development" by Sabine Hossenfelder
"The Importance of Collaboration in Look Development" by Jessica Townsend

Last Posts


1920 1080 Omid Mardan

Everything About Light and Color in Look Development in 3D Visualization

Summary: Look development is a crucial aspect of 3D visualization, and understanding how to use light and color can greatly enhance the final result. In this blog post, we will explore the different types of light and color, how they affect the look of a 3D model, and best practices for using them in look development.

Introduction: Look development is the process of creating the final appearance of a 3D model, including lighting, materials, and textures. Light and color are two essential elements of look development, as they greatly affect the mood, atmosphere, and realism of a scene. Understanding how to use different types of light and color can help you create stunning and realistic 3D visualizations.

Types of Light:
There are several types of light that are commonly used in 3D visualization, including ambient, directional, point, and spot lights. Ambient light provides a general illumination to a scene, while directional light simulates sunlight and casts shadows. Point light emits light in all directions from a single point, while spot light creates a cone of light that can be directed at specific areas of a scene.

Each type of light has its own unique properties and can be used to create different effects in a scene. For example, directional light can create dramatic shadows and highlights, while ambient light can create a soft and subtle atmosphere.

Types of Color:
Color is another important element of look development, and understanding the different types of color can help you create a cohesive and visually appealing scene. There are several types of color, including primary, secondary, tertiary, complementary, and analogous colors.

Primary colors are red, blue, and yellow and cannot be created by mixing other colors. Secondary colors are created by mixing two primary colors, while tertiary colors are created by mixing a primary and a secondary color. Complementary colors are opposite each other on the color wheel, while analogous colors are next to each other.

Using color theory, you can create harmonious and balanced color schemes that enhance the mood and atmosphere of a scene.

Best Practices:
When using light and color in look development, it’s essential to consider the overall mood and atmosphere you want to create. Start by defining the main light source and the color palette you want to use. Consider the type of scene you are creating and the emotions you want to evoke.

Experiment with different types of light and color and adjust the intensity and direction of the light to create the desired effect. Pay attention to how light interacts with different materials and textures, and adjust the specular and diffuse values accordingly.

Conclusion: Light and color are essential elements of look development in 3D visualization, and understanding how to use them can greatly enhance the final result. By using different types of light and color and experimenting with different settings, you can create stunning and realistic 3D visualizations that evoke the desired mood and atmosphere.

References:
"The Art of Lighting and Rendering" by Mark Farish
"The Importance of Color in Design" by Elizabeth Cole
"Look Development in Film and Animation" by Eric Miller
"Understanding Light and Shadow in 3D Modeling" by Michael James Smith
"Color Theory for Digital Artists" by Scott Naismith

Last Posts


1920 1080 Omid Mardan

Getting Realistic 3D Rendering: Tips and Techniques

Summary: 3D rendering has become an essential tool for visualizing architectural designs, product designs, and animations. Creating realistic 3D rendering requires skills, techniques, and tools to achieve a lifelike representation of a concept. In this blog post, we will discuss some tips and techniques that can help you achieve a more realistic 3D rendering.

Introduction: 3D rendering has become an important part of various industries, from architecture to advertising. Creating a realistic 3D rendering can help you showcase your ideas, designs, and products in a more detailed and engaging way. However, achieving a lifelike representation can be challenging, as it requires knowledge of different techniques, tools, and a good understanding of the design principles. In this blog post, we will explore some tips and techniques to help you achieve a more realistic 3D rendering.

Tips and Techniques:
1. Lighting: The lighting is one of the most critical factors in creating a realistic 3D rendering. The use of natural lighting, soft shadows, and reflections can make a big difference in the overall appearance of the scene. You can use different lighting techniques, such as global illumination, to simulate the light distribution in a scene.

2. Texturing: The use of high-quality textures can enhance the realism of your 3D rendering. Textures can be used to create the appearance of different materials, such as wood, metal, and fabric. You can use different texture maps, such as diffuse, bump, specular, and normal maps, to create a more detailed and lifelike representation.

3. Modeling: The quality of the 3D models is also essential in creating a realistic 3D rendering. You should pay attention to the details of the model, such as the shape, size, and proportion. You can use different modeling techniques, such as subdivision modeling, to create smooth and detailed models.

4. Camera settings: The camera settings, such as the field of view, depth of field, and aperture, can also impact the realism of your 3D rendering. By adjusting the camera settings, you can create a more natural and lifelike representation of the scene.

5. Post-processing: The use of post-processing techniques, such as color grading, can help enhance the realism of your 3D rendering. You can adjust the colors, contrast, and saturation to create a more appealing and engaging image.

Conclusion:
Creating a realistic 3D rendering requires a combination of skills, techniques, and tools. By following the tips and techniques discussed in this blog post, you can achieve a more lifelike representation of your design or product. Whether you are a beginner or an experienced 3D artist, these tips can help you improve the quality of your 3D rendering.

References:
"10 Tips for Creating Realistic 3D Renders" by Arif Mohd
"3D Modeling Techniques and Best Practices" by Tim Zarki
"Lighting for Realistic 3D Renders" by Liam Keating
"Textures for 3D Modeling and Rendering" by Jamie Cardoso
"Color Grading Techniques for 3D Renders" by Alex Beddows.

Last Posts

1920 1235 Omid Mardan
Start Typing
Verified by MonsterInsights